Safety 1st Infant Car Seat Manual: A Comprehensive Guide
Safety 1st car seat manuals offer detailed guidance for installation and safe usage, ensuring your child’s protection during every journey․ Downloadable PDFs are readily available!
Safety 1st has become a trusted name in child passenger safety, dedicated to providing innovative and reliable car seats for decades․ Choosing a Safety 1st car seat means prioritizing your little one’s well-being on the road․
These seats are engineered with a focus on both safety features and ease of use for parents․ From infant car seats designed for newborns to convertible models that grow with your child, Safety 1st offers a range of options to suit different stages and needs․
However, maximizing the protective benefits of a Safety 1st car seat hinges on understanding its specific features and following the instructions outlined in the accompanying manual․ Proper installation and correct usage are paramount to ensuring optimal safety․
Importance of Reading the Manual
The Safety 1st car seat manual isn’t just a collection of instructions; it’s a vital guide to protecting your child․ Failure to follow the warnings and guidelines can lead to serious injury or even death in the event of a crash․
Understanding the specific installation procedures for your model – whether using the vehicle seat belt or the LATCH system – is crucial for a secure fit․ The manual details proper harness adjustment, chest clip placement, and recline angle indicators․
Furthermore, it outlines important safety features like side impact protection and energy-absorbing foam, and clarifies warning labels․ Reading the manual ensures you’re utilizing all safety features correctly and maintaining the car seat properly for its lifespan․

Understanding Your Car Seat Model
Safety 1st offers diverse models like OnBoard 35 LT and Continuum; identifying yours is key to accessing the correct manual and safety guidelines;
Identifying Your Specific Safety 1st Model (OnBoard 35 LT, Continuum, etc․)
Accurately identifying your Safety 1st car seat model is the crucial first step to ensuring correct installation and usage․ Common models include the OnBoard 35 LT, known for its infant-specific design, and the versatile Continuum, a 3-in-1 car seat adapting to various stages․
Locate the model number typically found on a label affixed to the car seat’s base or side․ This label often includes manufacturing details and weight/height limits specific to that model․ Referencing this number when downloading the manual from the Safety 1st website guarantees you have the correct instructions․
Different models have unique features and installation procedures; using the wrong manual could compromise your child’s safety․ Always double-check the model name and number before proceeding with any installation or adjustment․
Weight and Height Limits
Understanding the weight and height limits of your Safety 1st car seat is paramount for your child’s safety․ These limits are clearly stated in the car seat’s manual and on the label affixed to the seat itself․ The OnBoard 35 LT, for example, typically accommodates infants weighing 4-35 lbs (1․8-15․9 kg) and measuring up to 32 inches (81․3 cm)․
Exceeding these limits compromises the car seat’s protective capabilities in a crash․ Regularly check your child’s weight and height against these specifications․ Transitioning to the next stage car seat when your child reaches the upper limits is essential․
Never assume your child is safe simply because they still fit in the seat; weight and height are critical factors․ Prioritize adherence to these guidelines for optimal protection․
Car Seat Components Overview
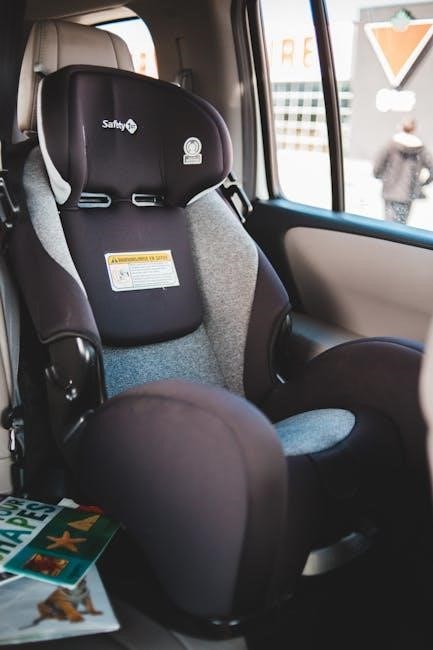
Familiarizing yourself with the components of your Safety 1st car seat is crucial for correct installation and usage․ Key parts include the shell, harness straps, buckle, chest clip, and recline adjuster․ The base, often used with infant car seats, features a belt path for vehicle installation and a level indicator․
The harness system secures your child, with adjustable straps and a buckle for a snug fit․ The chest clip positions the straps correctly across your child’s shoulders․ Energy-absorbing foam within the shell provides added impact protection․
Refer to your specific model’s manual for detailed diagrams and explanations of each component․ Understanding these parts ensures you can confidently and safely use your car seat․
Installation Procedures
Proper installation, utilizing either the vehicle seat belt or LATCH system, is paramount for car seat safety; always consult your manual!
Vehicle Seat Belt Installation
Securing your Safety 1st infant car seat with a vehicle seat belt requires careful attention to detail․ Begin by routing the belt through the designated belt path on the car seat, as illustrated in your manual․ Ensure the belt lies flat and isn’t twisted․
Locking the seat belt is crucial; many vehicles have a locking latch plate․ Pull the belt all the way out, then slowly retract it to engage the locking mechanism․ If your vehicle lacks a locking latch plate, utilize the automatic locking feature – simply pull the belt out until it locks․
Once locked, firmly tighten the seat belt by pushing down on the car seat while pulling the slack out of the belt․ Eliminate any slack to achieve a snug, secure fit․ Remember, not all vehicle belts and seating positions are compatible, so consult your vehicle’s owner’s manual for guidance․
LATCH System Installation
The LATCH (Lower Anchors and Tethers for Children) system offers an alternative installation method for your Safety 1st infant car seat․ Locate the lower anchors in your vehicle’s seat bight – the space between the seat cushion and backrest․ Attach the car seat’s lower connectors to these anchors, ensuring a secure click․
Next, extend the top tether (if applicable for your model) and connect it to the designated tether anchor point in your vehicle․ This minimizes forward movement during a crash․ Tighten the LATCH straps by pulling on the adjustment straps until the car seat is firmly installed․
Verify a secure installation by attempting to move the car seat side-to-side and front-to-back; it should move less than one inch in any direction․ Always consult your vehicle’s manual for LATCH system weight limits․
Recline Angle Indicators & Adjustment
Maintaining the correct recline angle is crucial for infant safety․ Safety 1st car seats feature built-in recline angle indicators – typically a line or bubble level – to guide proper positioning․ Refer to your car seat manual for the specific angle required for your infant’s weight and age․
To adjust the recline, locate the recline adjustment mechanism, often a handle or lever located at the base of the car seat․ Adjust the angle incrementally, checking the indicator after each adjustment․ Ensure the indicator shows the correct angle before each use․
A proper recline supports the infant’s head and neck, preventing slouching and maintaining an open airway․ Never use a recline angle that is steeper than recommended․
Checking for a Secure Installation
After installation, rigorously check for a secure fit․ The car seat should not move more than one inch side-to-side or front-to-back when tested at the belt path․ Grasp the car seat near the belt path and firmly tug․ If excessive movement exists, retighten the vehicle seat belt or LATCH connectors․
Re-check the installation after any adjustments․ Ensure the vehicle seat belt lies flat and isn’t twisted․ For LATCH installations, confirm the connectors are securely attached and the take-up straps are tight․
Consult your vehicle owner’s manual for specific guidance on car seat installation․ A properly installed car seat is paramount for your child’s safety during travel․

Harnessing Your Child
Properly securing your child involves adjusting the harness height, chest clip placement, and tightening straps—vital steps detailed in the Safety 1st manual․
Proper Harness Height Adjustment
Ensuring the harness is at the correct height is paramount for your child’s safety․ The Safety 1st manual emphasizes adjusting the harness slots to either at or just below your child’s shoulders when they are facing rear-facing․
As your child grows, and transitions to forward-facing, the harness slots should be adjusted to at or above their shoulders․ Regularly check this, as a properly positioned harness maximizes protection in the event of a crash․ Incorrect height can compromise the car seat’s ability to restrain effectively․
The manual provides clear illustrations demonstrating how to adjust the harness straps․ Always re-thread the harness when making adjustments, and confirm a snug fit after each change․ Remember, a correctly adjusted harness is a crucial component of a safe ride!
Chest Clip Placement
The chest clip, a vital component of the five-point harness, must be positioned correctly for optimal safety․ The Safety 1st car seat manual instructs that the chest clip should always be placed at armpit level․ This ensures it effectively keeps the harness straps positioned on your child’s shoulders;
Never place the chest clip on your child’s neck or too low on their chest, as this can cause discomfort and potentially compromise safety during a collision․ The clip’s purpose is to centralize the harness, preventing straps from sliding off the shoulders․
Always ensure the chest clip is securely fastened․ Regularly check its position, especially after adjusting the harness․ Proper chest clip placement, combined with a snug harness, provides the best possible protection for your little one․
Tightening the Harness Straps
Achieving a secure fit is paramount when using a Safety 1st infant car seat․ The manual emphasizes tightening the harness straps to eliminate any slack․ After buckling your child in, pull the harness straps firmly at the shoulders․ You should not be able to pinch any excess webbing at the collarbone area․
A properly tightened harness prevents excessive forward movement during a sudden stop or collision․ The manual often details specific tightening mechanisms for each model, such as a central adjuster․ Ensure both straps are tightened equally to distribute the force evenly․
Regularly check the harness tightness, especially as your child grows․ A snug, but not overly tight, fit is crucial for their safety and comfort․
Understanding the Five-Point Harness System
Safety 1st infant car seats utilize a five-point harness system, considered the most secure restraint method for young children․ This system features two shoulder straps, two hip straps, and a crotch strap, all converging at a buckle․ The manual stresses the importance of using all five points for optimal protection․
Each strap works in conjunction to distribute crash forces across the strongest parts of the child’s body – shoulders, hips, and crotch; This minimizes the risk of injury during a collision․ The harness keeps your child securely positioned within the car seat’s protective shell․
The manual details proper strap routing and adjustment to ensure the system functions correctly․ Never add padding or aftermarket products to the harness․

Safety Features & Warnings
Safety 1st car seats include side impact protection and energy-absorbing foam, but always heed warning labels for proper use and FAA approval․
Side Impact Protection
Safety 1st prioritizes your child’s safety, and many of their infant car seats are engineered with robust side impact protection features․ These features are designed to distribute crash forces away from your baby during a collision․
Specifically, look for models incorporating energy-absorbing foam in the headrest and side wings․ This foam acts as a crucial buffer, reducing the impact transferred to your child’s head, neck, and torso․ The design aims to provide an extra layer of security beyond standard crash testing․
Always refer to your specific car seat model’s manual for detailed information regarding its side impact protection capabilities and ensure proper installation for optimal effectiveness․ Understanding these features contributes significantly to a safer travel experience․
Energy-Absorbing Foam
Safety 1st car seats frequently utilize energy-absorbing foam, a critical component in maximizing child safety during a vehicle collision․ This specialized foam is strategically placed within the car seat’s shell, particularly in the headrest and along the sides, to effectively manage and dissipate crash forces․
Upon impact, the foam compresses, absorbing a significant portion of the energy that would otherwise be transferred to your child․ This reduces the risk of serious injury by minimizing the deceleration forces experienced․ Different models may employ varying densities and types of foam for optimized performance․
Regularly inspect the foam for any signs of damage or compression․ Refer to your car seat’s manual for specific guidance on maintaining and assessing the integrity of this vital safety feature․
Warning Labels and Their Meaning
Safety 1st infant car seats are covered with numerous warning labels – these aren’t just formalities, they are crucial safety instructions! Understanding these labels is paramount to correct usage and protecting your child․ Labels detail weight and height limits, proper installation methods, and prohibited modifications․
Pay close attention to warnings about rear-facing versus forward-facing positions, and never exceed the car seat’s weight or height restrictions․ Labels also caution against using aftermarket products not approved by Safety 1st, as these can compromise safety․
“Failure to follow warnings can result in serious injury or death” is a common, vital message․ Always reread these labels periodically to reinforce safe practices․
FAA Approval for Air Travel
Many Safety 1st infant car seats are approved for use on aircraft by the Federal Aviation Administration (FAA)․ However, not all models meet these requirements, so verification is essential before flying with your child’s car seat․
Look for a sticker on the car seat itself indicating FAA approval․ This confirms it’s been tested and meets safety standards for airplane use․ When flying, the car seat can be used during takeoff, landing, and throughout the flight, providing a familiar and secure environment for your baby․
Always check with your airline for specific policies regarding car seat usage, as some may have restrictions based on seat type or aircraft model․

Maintenance and Cleaning
Regularly inspect your Safety 1st car seat for damage, clean the cover, and replace worn parts to ensure continued safety and functionality․
Cleaning the Car Seat Cover
Safety 1st recommends gentle cleaning for your car seat cover to maintain hygiene and comfort for your little one․ Typically, the cover is removable and machine washable – always check your specific model’s manual for precise instructions! Use a mild detergent and cold water, avoiding harsh chemicals or bleach, as these can compromise the fabric’s integrity and safety features․
After washing, ensure the cover is completely dry before reinstalling it onto the car seat․ Air drying is often preferred to prevent shrinkage or damage from machine drying․ For minor spills or stains, a damp cloth with mild soap can be used for spot cleaning․ Never use abrasive cleaners or scrub brushes․ Remember, a clean car seat is a safer and more pleasant environment for your child!
Inspecting the Harness and Buckle
Regularly inspecting the Safety 1st car seat’s harness and buckle is crucial for continued safety․ Check the straps for any signs of wear, fraying, or damage․ Ensure the buckle operates smoothly and securely locks and unlocks correctly․ Look for cracks or damage to the plastic components of both the harness and buckle system․
Pay close attention to the harness webbing; any cuts or abrasions weaken its ability to restrain your child effectively․ If you notice any defects, immediately discontinue use of the car seat and contact Safety 1st customer support for assistance; A compromised harness or buckle can significantly reduce the car seat’s protective capabilities, so diligent inspection is paramount․
Replacing Damaged Parts
Safety 1st strongly advises against attempting to repair any damaged components of your infant car seat yourself․ Never use aftermarket parts or make modifications to the original design․ If any part – harness, buckle, shell, or cover – is damaged, it must be replaced with a genuine Safety 1st replacement part․
Contact Safety 1st customer support to order the correct replacement part for your specific car seat model․ They can guide you through the process and ensure you receive the appropriate component․ Improperly installed or non-genuine parts can compromise the car seat’s safety performance․ Prioritize your child’s well-being by always using authorized replacements․

Car Seat Expiration Dates
Safety 1st infant car seats, like all car seats, have expiration dates․ This isn’t about the seat physically falling apart, but rather the plastic degrading over time, potentially compromising its crashworthiness․ The expiration date is typically located on a label affixed to the car seat itself – often on the side or back․
Generally, infant car seats are designed to be used for six to ten years from the date of manufacture, not the date of purchase․ Do not use a car seat past its expiration date․ Plastics become brittle, and the harness system may weaken․ Always check the label and adhere to the specified timeframe for optimal safety․
Registration and Support

Safety 1st encourages car seat registration for crucial safety updates and recall notifications, alongside readily available customer support resources online and via phone․
Registering Your Car Seat
Registering your Safety 1st infant car seat is a vital step in ensuring your child’s safety and staying informed about important product updates․ This process allows Safety 1st to directly contact you in the unlikely event of a recall or safety notice pertaining to your specific model․
Registration is typically a quick and easy online process, often requiring only the car seat’s model number and manufacturing date – both found on a label affixed to the car seat itself․ Your registration demonstrates a commitment to your child’s well-being and helps Safety 1st maintain a direct line of communication with you․
By registering, you contribute to a safer community for all children․ Don’t delay; register your car seat today to benefit from this essential safety measure and access valuable support resources․
Contacting Safety 1st Customer Support
Safety 1st prioritizes customer satisfaction and offers multiple avenues for support regarding your infant car seat․ If you encounter difficulties with installation, have questions about proper usage, or require assistance with a specific model like the OnBoard 35 LT or Continuum, their dedicated team is ready to help․
You can typically find contact information – including phone numbers and email addresses – on the Safety 1st website․ Many frequently asked questions are also addressed in their online support section, potentially providing immediate answers to common concerns․
Don’t hesitate to reach out to Safety 1st customer support if you need clarification or assistance․ They are committed to ensuring you feel confident and secure using their products for your child’s safety․
Finding Additional Resources Online
Beyond the official Safety 1st website and downloadable manuals for models like the OnBoard 35 LT and Continuum, numerous online resources can supplement your understanding of infant car seat safety․ Several websites offer independent car seat installation guides and videos, demonstrating proper techniques for both vehicle seat belt and LATCH system installations․
Parenting forums and communities often feature discussions about Safety 1st car seats, where you can learn from other parents’ experiences and find answers to specific questions․
Remember to always verify information with official Safety 1st documentation or customer support to ensure accuracy and adherence to safety guidelines․ Prioritize reliable sources for optimal child protection․